Color blending or mixing is admittedly one of those areas in commercial machine embroidery digitizing that are easier said than being done. The advice on the subject is rampant and easily accessible. But, it is an altogether different story when we are actually talking about execution. Embroidery digitizers, especially the new ones, find it hard to wrap their heads around such advice, which is often deemed as an airy-fairy affair.
The cause for this negligence is that actual color or gradient mixing takes experience and experimenting, before one finally starts to develop a ‘sense’ of how things are actually working. But, it is not the only reason. Partially, it has to do with the way color blending is taught. Irrespective of your skill level, a basic understanding of color mixing principles is essential.
We will break color mixing in commercial machine embroidery digitizing to the basic, and take things from the beginning. So, without further ado, let us plunge into the basics.
Basics Of Color Blending – Color Wheel
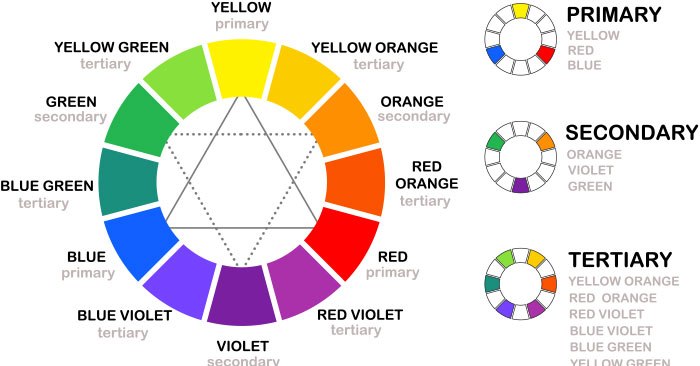
Color wheel’s importance is paramount for understanding the working principles of color blending. Primary colors are Red, Yellow and Blue. This means that no two or more colors can be mixed together to form these colors. Other colors, secondary and tertiary, as we will see, are formulated by the interaction and mixing of these basic colors.
As you can see, between red and yellow, there is orange. It is a secondary color and what this means is that to achieve a perfect orange, it has to be half red and half yellow. Similarly, between yellow and blue, there is green and between blue and red, there is purple.
Between all these, there can be multiple nuances of these shades, depending upon the constituent proportions. For instance, consider the red-orange. It is a shade that lies between red and yellow. Inferred from the name, the composite color proportion is tilted towards red. To achieve red-orange, one portion of yellow should be mixed with two portions of the red. Whereas, the inverse is true about compositions if you look at yellow-orange shade.
These gradations between primary and secondary colors give rise to innumerable possibilities. Mixing all the three colors will get you brown. The result is same when you mix any of these two secondary colors. The problem practically arises when we have to deal with the threads. A yellow thread, for instance, is never purely yellow and has tinges of other shades.
Say it has a mixing of orange and you are mixing it with green thread. As mixing of secondary colors, produces brown, the resulting blend will have a brownish flair to it. Changing supplies is not easy when you have already got them. Instead, what you can do is to be better informed about their shades, and act accordingly in machine embroidery digitizing to play down the effect of impurities.
Using Thread Chart:
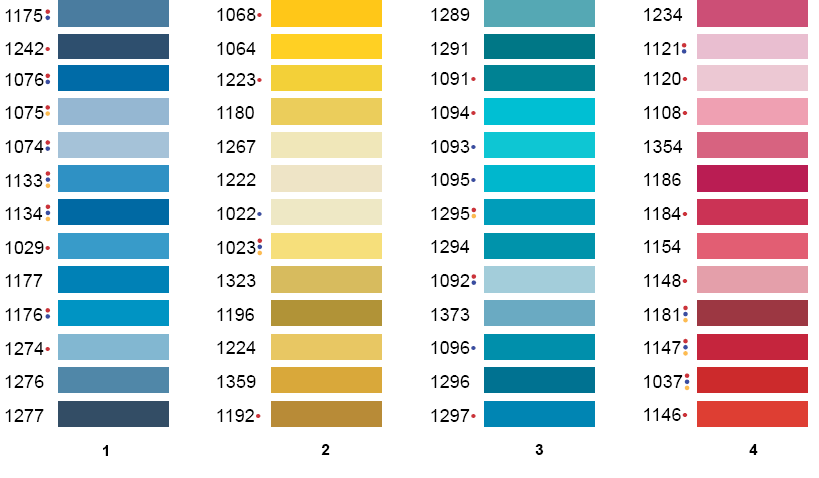
Checking the impurity or purity of a thread color, you will need a thread chart. A thread chart is arranged by color families and allows you to conveniently make a comparison. Apparently, two blue threads are exactly same, but upon checking they are almost invariably different.
Mild differences in thread colors, that go unnoticed with the naked eye, will help you choosing the spools of threads that you need for efficient blending.
Playing With Stitch Density In Machine Embroidery Digitizing:
Perfecting color mixing is not merely about the composite colors. Alongside achieving desired shades, it is also about remaining efficient in doing so. One of the major reasons for this blending in machine embroidery digitizing is to induce a sense of reality to the embroidered designs. Unless the blending is smooth and natural, it is impossible to entail a sense of realism in embroidered designs.
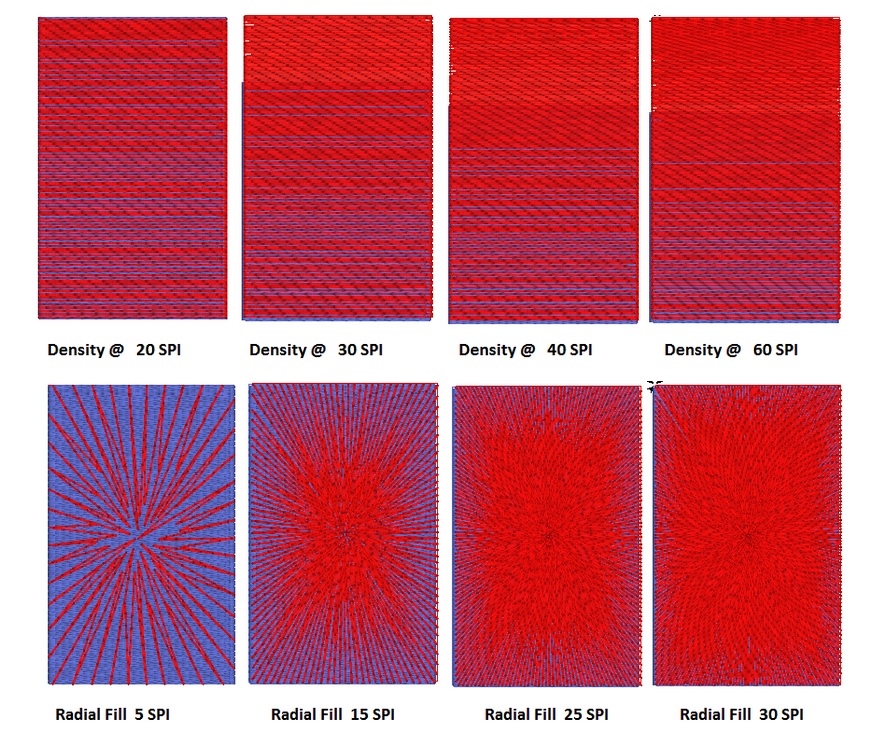
To entail this fluidity in designs, the standard practice is to use three different shades of thread. The stitch density is often set to one-third of the default stitch density in embroidery digitizing software. These threads, at one third of their default values, are layered to blend subtly in the design.
Alongside adjusting stitch densities, there are few parallel considerations that one must abide by. Firstly, stitches must not rest on top of each other. In areas where different stitches overlap, the needle must land in the vicinity, and not on top of existing stitches. Secondly, the stitch angle and direction of layers must be same. Otherwise, the change will seem unnatural and will immediately catch the attention.
If followed correctly, these quick tips will certainly help an embroidery digitizer to digitize the designs for color blending in a more efficient manner.
In order to get professional embroidery digitizing assistance, get in touch with us. Absolute Digitizing is rendering reliable and professional services for the lowest cost from the last 15 years. For very low rates of $1/ 1000 stitches, get your designs digitized by experienced embroidery digitizers and get them delivered in less than a day.


