
| Summary |
|---|
Realistic dog embroidery starts with a clear photo and smart stitch planning.
|
The most taxing and creative task in digitizing for embroidery is to create a realistic design of dogs. The design needs to have the life, feel, emotions, and illusion of movement of a real dog, just like a good animal painting. It must not appear like a lifeless caricature of the real animal. It takes immense precision, practice, and above all knowledge of the process to bring life into the design. The most crucial part is to get that cute fuzzy fur right and design it into the realistic layers. Here, we will share with you the secret tips behind our best-selling skill, i.e custom embroidery digitizing of a real dog photo.
By the end of this blog, you will be well-versed in the facts and details about the art of digitizing that perfect fur, muscles, and face from the photo of your pet, ready for machine embroidery. So, here are the tips and tricks for converting your favorite animal photo into a digitized embroidery design.

1. How to start digitizing a dog’s image for machine embroidery:
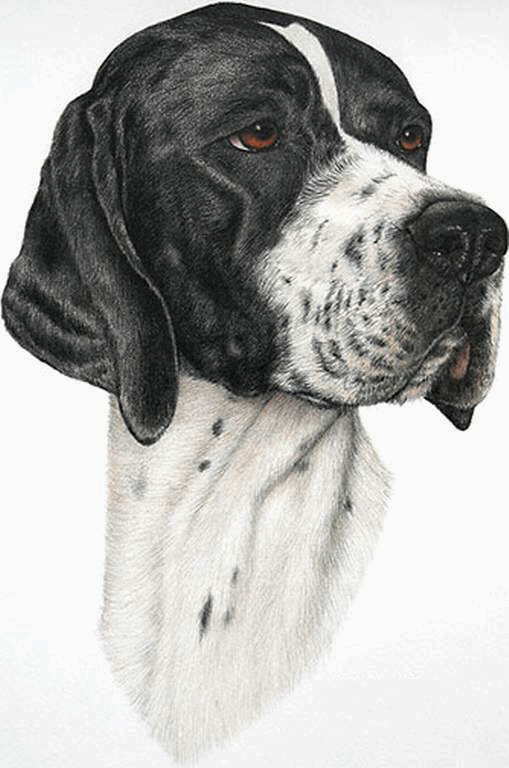
Embroidery digitizing is based on the clarity and quality of an image. This image could either be a drawing or a photograph. Now, here is an important decision that will create the right base for digitizing a real dog. We would advise you to use a real photograph. The photo should be clear in high resolution and must highlight the details of the pose of your dog, which you would like to get embroidered. A clear, crisp picture is important, as it will help a digitizer work on all the difficult areas.
The usual practice in this industry is to follow the picture of the dog after starting the digitizing task. But this is a complete NO! It would affect your judgment of the details and would change the result completely. We recommend that you keenly observe the picture and first pin the difficult areas in your mind. The best track is the old school way of visualizing the image of that dog breed in your mind and holding the actual print of the picture in your hand while digitizing for embroidery. It would minimize the chances of apparently simple yet practically grave mistakes that most embroidery digitizers overlook.
The designs you will deal with will be of two kinds and sizes: Small and Big.
Smaller ones are trickier. In small designs, you have to avoid extremely tiny details due to space constraints. While omitting them, you have to identify the vital features and use them to make your dog look realistic and alive. Woof Woof!
The bigger-sized designs pose different problems. Here, the structure should be proportionate, or the design will turn out bland.
2. Direction of hair and the muscle structure:
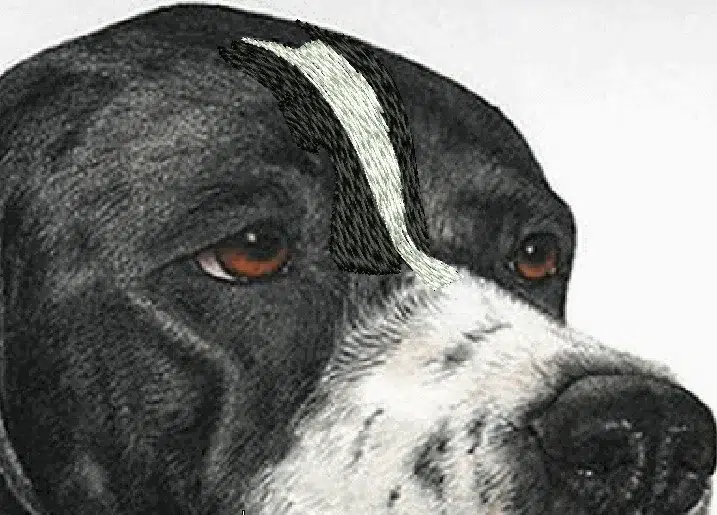
The direction of hair and muscle structure is the key to blowing life into your sew-out, so you must study them carefully. Now, we will tell you how to perfectly do digitizing for hair direction and muscle structure. We would recommend creating a bright-colored outline to keep the hair in the right direction. The colors should be bright, as they would not let you mix up the inner shades and outline. It’s like mapping out the directions.

3. How to Use Colors and Shades:

Digitizing real animals only looks natural and alive by using more colors, but using diverse colors requires great expertise and skills. Unless you are creative and expert enough, you should stick to using two basic shades, lighter and darker, to achieve the required result.
4. How to visualize the photo of the dog for a perfect embroidery output:
You must always keep in mind that the foreground is the hero of your dog embroidery designs. The animal will be in the foreground, so your aim should be to make the foreground more striking. The background should have horizontal filling, while the foreground must be vertical and angular. You should keep this detail in mind before digitizing your design for machine embroidery.
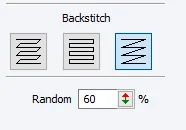
5. Choice of stitches:
We have been in the digitizing for embroidery industry for the last 15 years, and way before the advent of all the new fancy tricks. We know quite well that it all boils down to the choice of using the right type of stitches. The choice of an appropriate stitch type and an accurate parameter is pivotal in creating the desired natural-looking dog embroidery designs. The digitizer should apply these crucial details to get that eye-catching natural effect.
The embroidery digitizer has to consider the following basic instructions regarding various stitch types and their parameters while digitizing a real animal.
Begin with the Underlay:
Always start your design with the underlay to lend stability to your design. The golden rule is to use light density for smaller designs and a bit denser stitches for the larger ones. But this rule could have some variation. The larger design might sometimes require the same lighter density. However, you must have clear foundations to avoid any glitches in the design. A clear rule of thumb to digitize an animal is to use a lighter density of underlay than the normal left chest, hat, and jacket back designs. So, the initial decisive point is that a lighter underlay is a done deal here.

Fill Stitch or Tatami Stitch:
Fill stitches, also referred to as Tatami stitches, are applied to cover large areas. Adjust the stitch length accordingly to enhance muscle details, muzzle, nose, lip, cheeks, ear, and even other minor details. To create the fur effect of the animal, use the offset fraction accordingly.

Embroidery digitizing of dog breeds with less fur, like Besinge or Boxer, needs to be set at a lower offset fraction. Whereas the hairy breeds with denser fur, for instance, the ‘Afghan Hound or Siberian Husky ‘, are set at higher offset fraction and higher stitch length. The ideal recommendation is to remain in the range of 0.5 mm to 0.6 mm stitch density.
Satin Stitch or Column Stitch:
Satin stitches, sometimes referred to as column stitches, are used for both small and large designs. These stitches are used to digitize smaller body parts like teeth, the outline of the ear, eyes, and the minute detailing work. Always use a light underlay with Satin Stitches. Otherwise, you will end up in a mess, making the design stiffer and breaking your threads and even machine needles.
We recommend using somewhere between 0.7 mm and 1 mm stitch density when making different shades. Let them merge with the layer of stitches beneath them, which are the fill stitches, of course. However, there is one sacred rule you must not mess with: Never use an underlay while doing shading.

Run Stitch or Bean Stitch:
Run stitches, also known as bean stitches, are used to digitize the finer, minute, and tiny objects like whiskers. The safe stitch length should be kept between 3.5 mm and 4 mm to obtain a desired natural look.
The Angle of Stitches:
Using proper stitch angles aligned with the image of the animal is the key to success to give it an original, actual life-like furry look. This step is critical and should be done wisely. If you create wrong angles, then all of your hard work will go in vain. The focal point is the angle of the dog’s hair. Just to give a general example, the angle of hair from the nose to the forehead of a dog goes in a downward direction.

The bottom line here is the more accurate the angle, the more realistic your dog embroidery designs will be sewn.
We have kept our promise of educating you about the general as well as technical details for digitizing dogs and creating an accurate and natural look for your custom dog embroidery design orders.
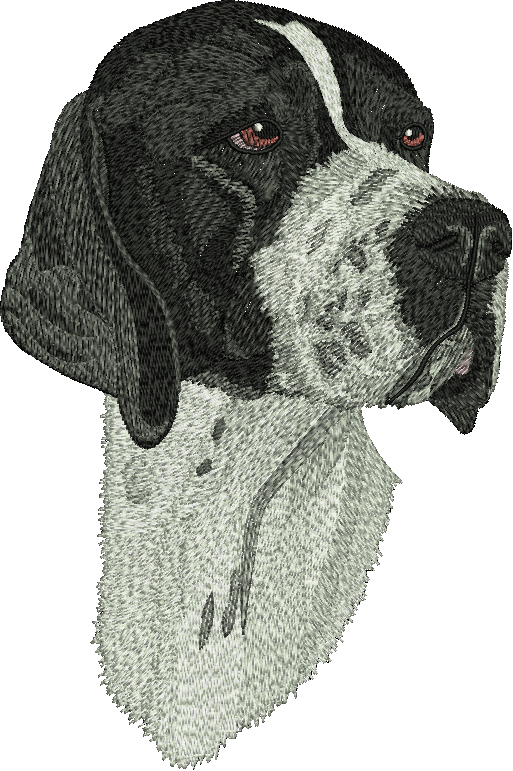
Final Thoughts
Digitizing dog embroidery designs takes skill, patience, and a clear plan. A high-quality photo gives the digitizer a strong starting point. Then, careful hair direction, muscle shape, thread shading, and stitch angles help bring the dog’s face and fur to life. Also, the right use of underlay, tatami, satin, and run stitches keeps the design clean, soft, and natural.
However, realistic pet embroidery can be tricky, especially with small details and furry textures. For this reason, let Absolute Digitizing handle your next embroidery design. Contact us today for expert embroidery digitizing services and get a free quote.
FAQs
To digitize dog embroidery designs, start with a clear photo. Then map the fur direction, face shape, muscle lines, and shading areas. Use the right stitch types and angles to create a realistic dog embroidery file.
The best photo is clear, bright, and high-resolution. It should show the dog’s face, fur, eyes, and pose in detail. A sharp photo helps the digitizer create a cleaner and more lifelike embroidery design.
Tatami stitches work well for fur and large areas. Satin stitches help with eyes, ears, teeth, and outlines. Run or bean stitches work best for whiskers and fine details. Also, a light underlay keeps the design stable.
Fur direction makes the dog look natural. When stitches follow the real hair flow, the design gains texture, depth, and movement. However, wrong stitch angles can make the dog look flat or messy.
Yes, but small dog embroidery designs need simple details. The digitizer should keep the eyes, nose, face shape, and key fur areas clear. Too many tiny details can make the design crowded and hard to stitch.